A quick & easy guide to using self-tanner as the ultimate bronze and contour hack
You already know that self-tanner is the safest way to get a year-round glow. But TikTok and the Instagram explore page have us quickly realizing that our favorite self-tanners can also be used to carve out cheekbones, contour the face and give you the best no-makeup bronze of your life.
The best new way to self-tan your face is being dubbed “tantouring,” and it uses your go-to sunless tanner to chisel out your features.
How to tantour (aka contour with self-tanner)
Instead of adding a full layer of tan to your whole face, this technique is exactly as the name suggests: a way to tan and contour in one! If this is your first time using a new self-tanning product, always apply a test patch to understand how your body reacts to the formula and how the color develops. Here’s how to tantour in five easy steps:
Step one: Prep your skin
As with any self-tanning experience, you’ll want to prep your skin properly for smooth application. Before applying your tan, you’ll want to wash your face with a gentle cleanser such as LaserAway Beauty Come Clean Purifying Face Wash, removing all makeup. Then gently exfoliate using a skincare product like LaserAway Beauty Polished Microdermabrasion Face & Body Scrub to buff away any dry skin. Follow up with LaserAway Beauty BFF SPF 50+ Broad Spectrum Sunscreen Tinted Color Corrector to keep your skin protected and tan-free!
Step two: Ready your self-tanner of choice
No need to find a self-tanner specific to the face—as it turns out, body formulas are nearly identical. Veteran self-tanners can attest that application is always easiest with a self-tanner that includes a color guide. This “built-in” color helps you see exactly where your self-tanner is being applied for more precise placement. Foams and mouses tend to be the formula de jour these days, particularly when it comes to the face for blendability.
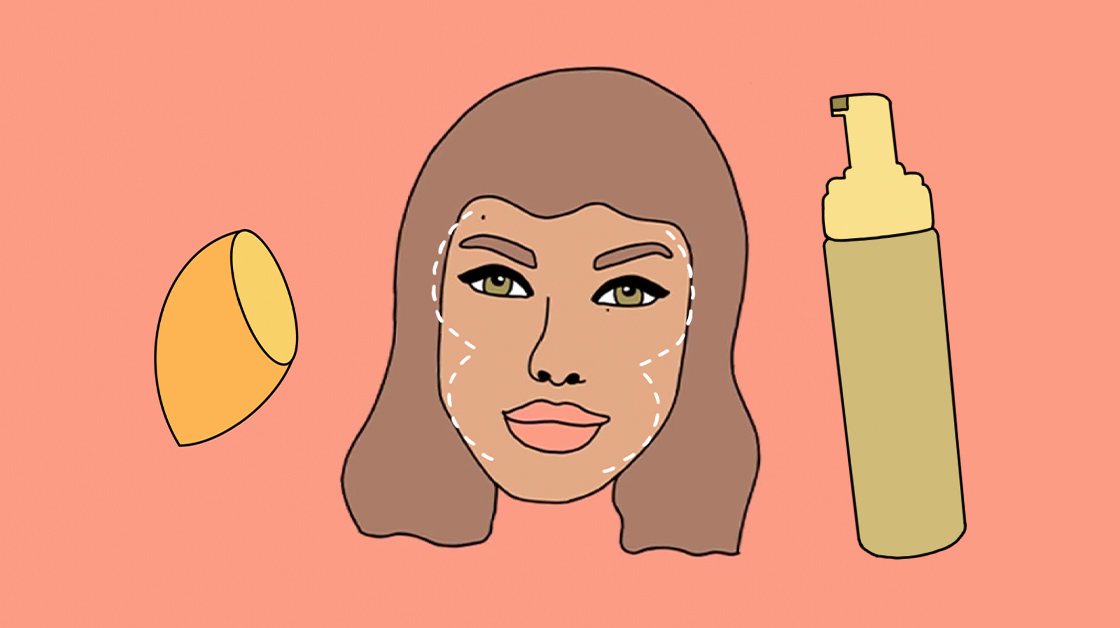
Step three: Choose your tool
While you can always apply your tan with your fingers (and wash immediately to avoid staining) or a mitt, when you’re tantouring you may want to do as you normally would when applying makeup. A beauty blender sponge or a contour brush can help you apply your tan to the face and help blend and sheer out the tan for a more natural flush of color and seamless finish.
Step four: Apply + touch-up
Pump a dollop of tanner onto a clean, rinsable palette. Lightly dip your tool of choice into your self-tanner and begin applying it to the face the way you would with contour or bronzer. Making a “3-shape” across both sides of the face, sweeping and blending the color into the hairline and temples, down into the hollows of the cheeks, and along and underneath your jawline.
If you mess up, you can use a dry towel to remove excess product and clean up your tantour, and tan erasing formulas are available if you need to start over completely. Blend out evenly before deciding if an additional layer is desired.
Step five: Bake
How long you should allow your tan to dry and develop will depend on how deep you like your contour color. If you like less definition, rinse off after a few hours. If you’re looking for more intensity and payoff, rinse off after a full eight hours.
Tan your way to a sculpted face
The best bronzer now comes in the form of self-tanner, but it does require the right technique for a truly flawless, lit-from-within glow. Practice makes perfect when it comes to tantouring, and don’t worry or stress too much about mistakes—face tans never last as long as they do on the body! Be sure to prep your skin, apply conservatively and touch up as needed. With this quick DIY base glow, you’ll be able to cut down on makeup time, boost your bronze and sculpt those cheekbones!
References
1. “What Is Tantouring? The Facial Self-Tanning Technique, Explained,” Allure, July 20, 2020.